Hello from the heat of the kitchen. Seriously, it’s getting hot in here.
This week I’m baking a cocktail in cake form. It was my husband’s birthday on Thursday and, as is traditional in my house, he challenged me to bake something specific, in this case a Pina Colada celebration cake. It’s very carbohydrate heavy, so diabetics beware. I’d suggest trying to get around 32 portions out of it if you're worried about the carbs.
Carb count: 2030g for the whole cake, 63.4g based on per serving based on 32 portions.
There are a few bits of equipment that are essential to have if you intend to recreate this cake yourself:
1. A cake wheel – absolutely vital when it comes to the decorating stage.
2. Large star shaped piping nozzle and disposable piping bags – trust me, for this you need disposable ones.
3. Cake board – you could use a large, flat, plate … but it’ll be difficult to tidy.
4. Cake pans — I’d suggest using 8-inch pans if you use my measurements.
5. Large metal spatula
As always, a stand mixer is a nice thing to have, but not strictly necessary as long as you don’t mind hard work. Kitchen scales are essential though; if you want to take up baking you really need to invest in a set, preferably electronic ones.
This cake has a madeira base. It’s pretty similar to what you call pound cake or yellow cake in the USA, so if you have a trusted recipe for either of those then feel free to substitute it in place of mine. I usually favor (look at me, I’m trying to adapt to your ways) the Victoria Sponge for celebration cakes, it’s lighter and I like the texture better, but this cake needs the extra strength of the madeira sponge. Interestingly, the madeira cake is not named for the Madeira islands; this variety of cake has its origins in the mid-1800s, and it takes its name from the wine that it was served with (the wine was named for the islands).
You’ll need to do a bit of prep work before you start on the actual baking; this is the kind of project that needs to be done over an entire day, possibly two. The first thing you’ll need to do is mix up a Pina Colada syrup (credit to Wonkette’s resident bartender, Hooper, for this one). For this you’ll need a ripe pineapple, a good quality coconut rum (not Malibu, you’ll upset Hooper – seriously, he’s not mad, just disappointed), sugar, and water. You won’t need a lot of syrup for this recipe, so be prepared to eat leftover pineapple — but save a wedge for decorative purposes.
Pina Colada Syrup
1 cup pineapple, in 2cm cubes
1 cup water
¾ cup granulated or superfine (caster) sugar
Coconut rum, to taste (2 tbsp was perfect for me)

I found this rum on Amazon, it is delicious, and it helps to save the sea turtles! I call that a win-win situation.
Simply combine the above ingredients (except for the rum) in a small saucepan, bring to a boil, then reduce the heat and allow to simmer for 40 minutes. Turn off the heat and allow to cool. Pass through a sieve to a bowl, squeezing as much juice as you can from the pineapple. Stir in the coconut rum until you’re happy with the balance of flavors – 2 tbsp was perfect for me, you might like it a little stronger.
Now it’s time to get started on your cake.
Madeira Cake
350g/12oz butter (at room temp)
350g/12oz caster sugar (superfine would be ideal, but granulated will work)
6 eggs
500g/18oz self-rising flour (if you don’t have this you can make it by adding 1 tsp of baking powder for every 200g of all-purpose flour)
4 tbsp milk
2 tsp vanilla essence
To decorate ;
Pina Colada syrup
Pineapple jam
Coconut rum
Buttercream ( recipe below )
Suitable cocktail accessories
Preheat your oven to 180C/350F/Gas 4 and grease two 8-inch cake pans. In your stand mixer or bowl, whisk together your butter and sugar until the mixture is pale and fluffy. Beat in your eggs one at a time; with the last egg add 2 tbsp of the flour as this will help to prevent the mixture from curdling.
Now sieve your flour into the mixture and carefully fold it in; the best way to do this is in figure-eight motions that move the mixture from the bottom of the bowl to the top. Add the milk and vanilla essence and stir.
Divide your cake batter evenly between the two cake tins and smooth the tops using the back of a metal spoon.

Pop the cakes into the oven for 40 minutes. You can check they’re finished by inserting a wooden skewer, if it comes out clean, you’re all done, if not then just pop them back for another 5 minutes, then re-check. Once baked, remove from the oven, and allow to cool for 15-20 minutes before transferring to a wire rack to finish cooling. Once cooled, slice each cake in half and trim off any massively uneven bits.
Coconut Rum Buttercream
1kg icing/confectioner’s sugar
500g butter
3 tbsp coconut rum
Yellow food coloring (gel food coloring works best)
Slowly mix together your butter and icing/confectioner’s sugar. Once it has started to combine, increase the speed, and whisk until pale and fluffy. Whisk the coconut rum through the buttercream. If the buttercream feels too stiff to work with, I have found adding 1 tbsp of boiling water softens it up nicely. Most recipes say to use milk, but if you use milk you won’t be able to store the finished cake for more than two days.
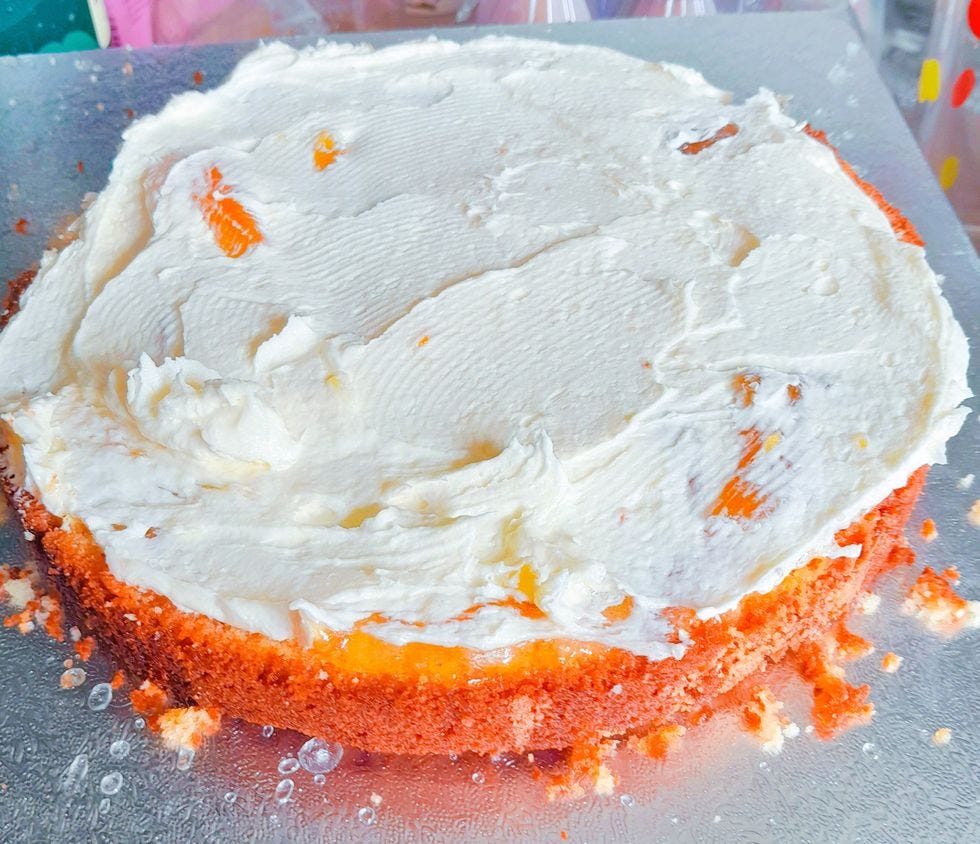
Place 1 tsp of buttercream in the centre of your cake board and place this on your cake wheel. Take one of the halves of your cakes and place it in the centre of your cake board, drizzle it with pina colada syrup, then spread generously with pineapple jam. Spread a layer of buttercream over the top, it should look a little like this…

Repeat this process until you have the desired number of layers (3 or 4 is ideal).
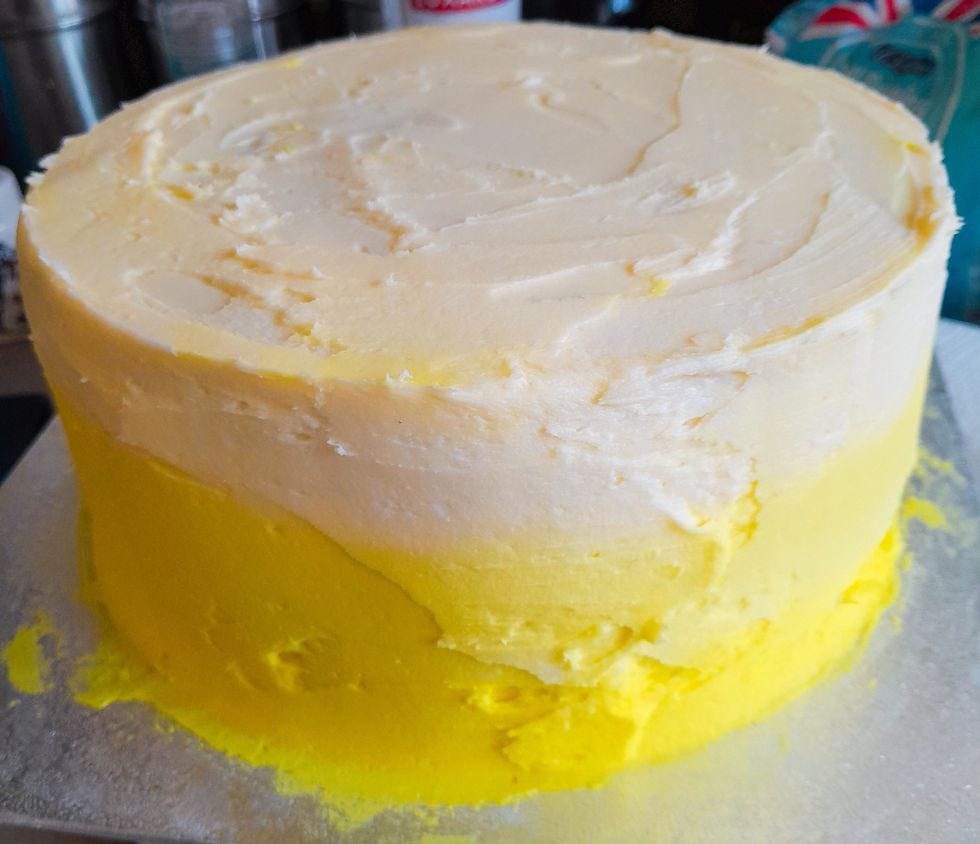
Next you need to crumb-coat your cake, I find the back edge of a butter/table knife works perfectly for this. All you need to do is spread a thin coat of buttercream over the cake. Use the flat edge of the knife to smooth it out. It should look something like this …

Ideally, you’d leave the crumb coat to set in the fridge for at least 30 minutes, if you can’t resist then don’t worry, it won’t be an issue if you don’t do that.
Now take 6-8 heaped tbsp of your buttercream and place it in a separate bowl. Mix in your yellow food coloring until you have a strong yellow color (1 tsp should be enough). Place the yellow buttercream into a disposable piping bag (without a piping nozzle) and cut off the end of the bag so the hole is about the size of your little fingertip. Now you’ll need to pipe this around your cake. The easiest way to do this is to touch the piping bag to the cake and then keep up a steady pressure on the bag while you slowly spin the cake wheel with your other hand (or ask a handy kitchen assistant to spin the cake wheel for you). You need two complete circles piping around the cake, working your way from the base of the cake upwards.
Put a couple of spoons full of the yellow buttercream aside for later and add another 2-3 tbsp of the white buttercream into the yellow mix. Mix thoroughly and then pipe this lighter yellow around the cake in the same way you did with the darker yellow, starting from immediately above the last layer you piped. Do not worry if your piping is messy, it’ll all smooth out later. Again, save some of the remaining buttercream.
You should be at the stage where two more circles will take you to the top of the cake. Now’s the time to switch to the white buttercream and repeat the piping circles.
Once you’ve finished the sides of the cake, pipe a few rough circles around the top and then set aside any remaining white buttercream. Grab a large, metal spatula and smooth your buttercream. The best way to do this is to hold the spatula so the long side rests gently against the buttercream and slowly spin the cake wheel with your free hand. As the icing is smoothed out the colors will blend together, giving you an ombre effect. If you don’t like the rustic look for the frosting you can chill the cake for an hour or so and then use a flexible, rubber spatula to smooth it out and get a more professional finish. I’ve opted for the rustic look with this one.

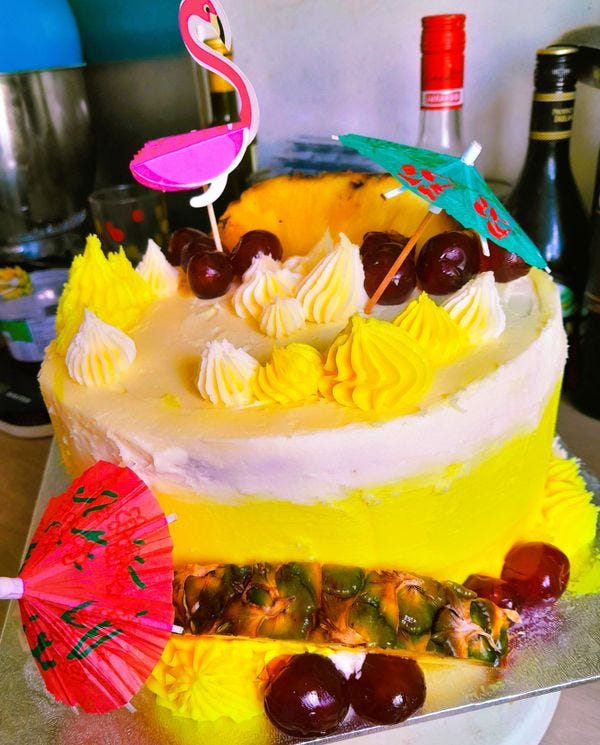
Finally, take your remaining buttercream and use your star shaped piping nozzle to add some flourishes. Decorate with a couple of slices of the pineapple and some cocktail cherries and then go to town with some suitable cocktail accessories.

And most importantly … Enjoy!
If you use the following Amazon link, Wonkette gets a small cut of your purchases.
Do your Amazon shopping through this link, because reasons .
Keep Wonkette going forever, please, if you are able! We love you.


I love this! I will be trying this one out. Side note, I did not know you could buy alcohol on Amazon!
Woo hoo! I am so not a baker but I will make one of your cakes!